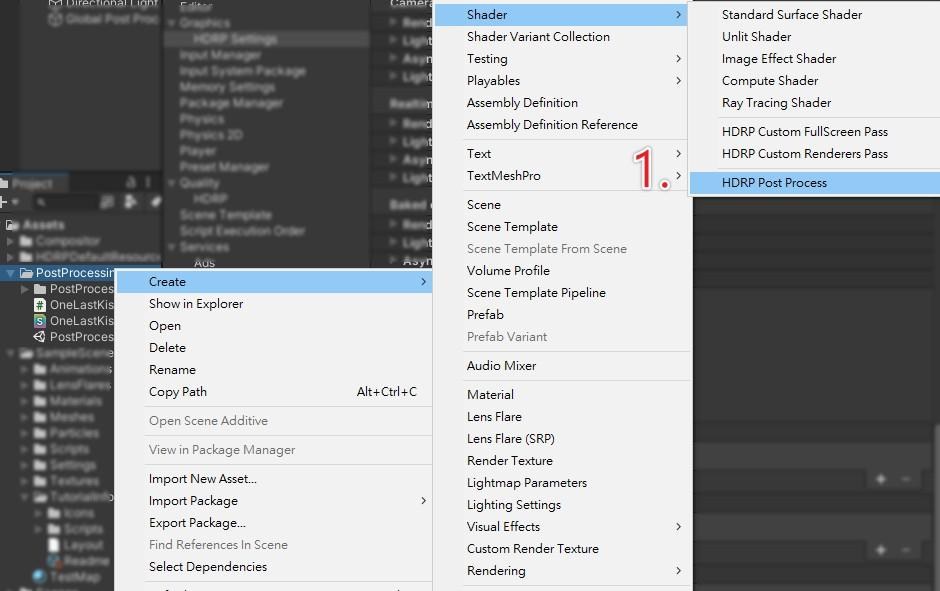
主題

是說可以用舊版格式發文阿,新版一堆毛我完全不想用 ![]()

| Input | Description |
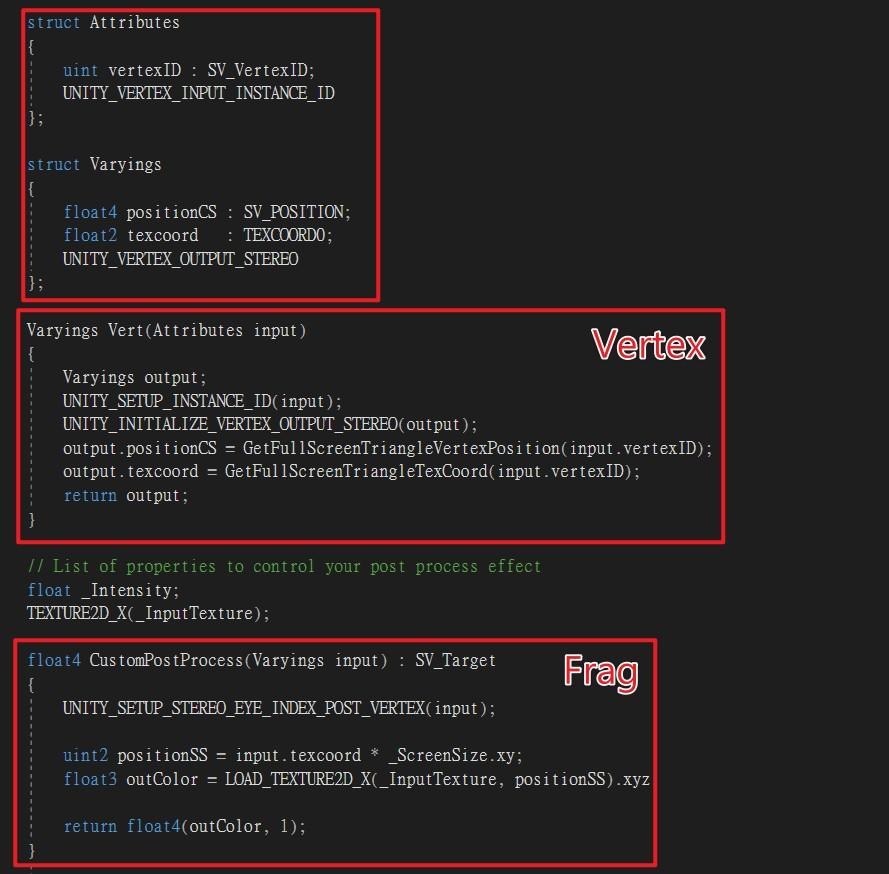
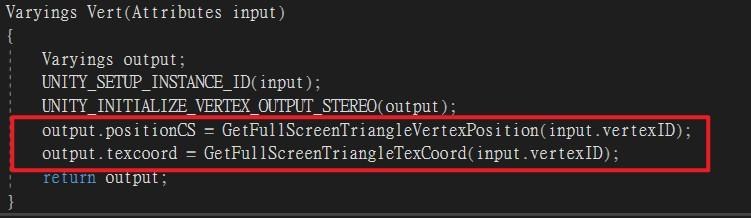
| positionCS | 回傳剪裁空間的位置。( 值 [0 , 螢幕大小] ) The clip space position of the pixel. This value is between 0 and the current screen size. |
| texcoord | 螢幕空間的 UV 。 ( 值 [0 ,1] ) The full screen UV coordinate. This value is between 0 and 1. |
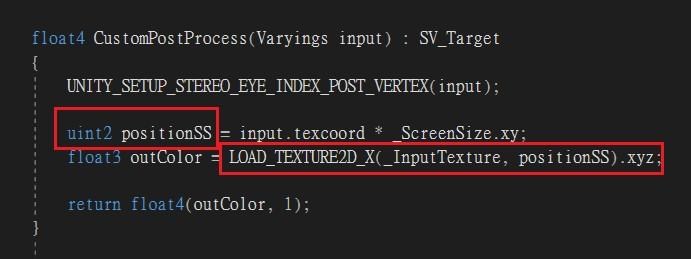
| _InputTexture | 畫面的材質 The source Texture. |
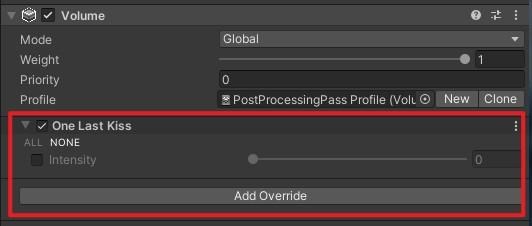
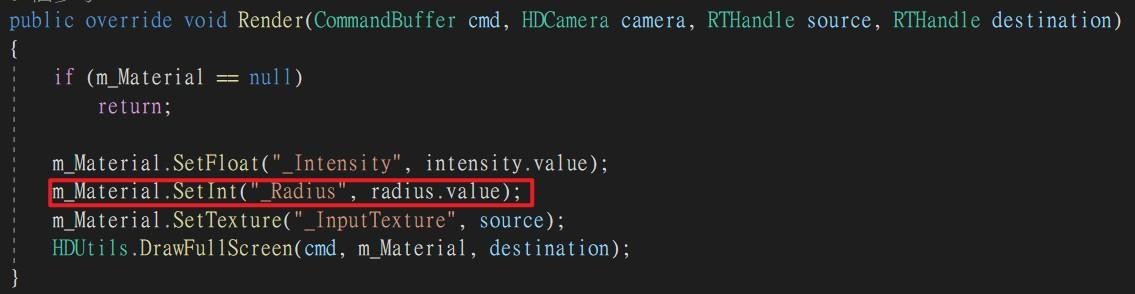
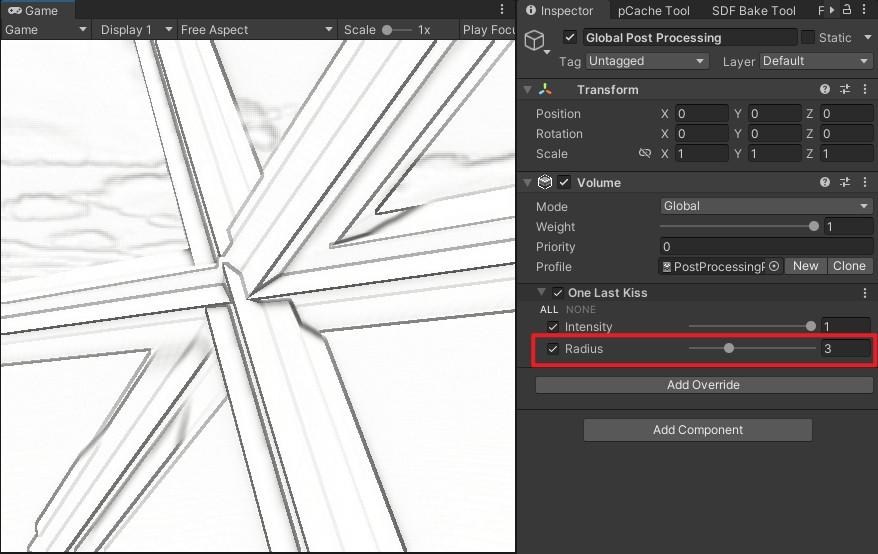
| _Intensity | 用操控效果強度的 The intensity of the effect. |
| uint2 positionSS = uint2(input.positionCS.xy); or uint2 positionSS = input.texcoord * _ScreenSize.xy - float2(0, 0.5); float3 col = LOAD_TEXTURE2D(_InputTexture, positionSS).rgb; |
| int _Radius; |
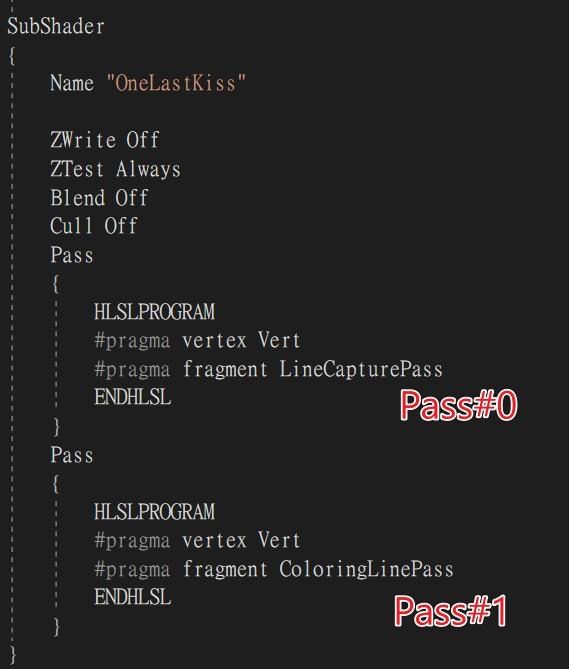
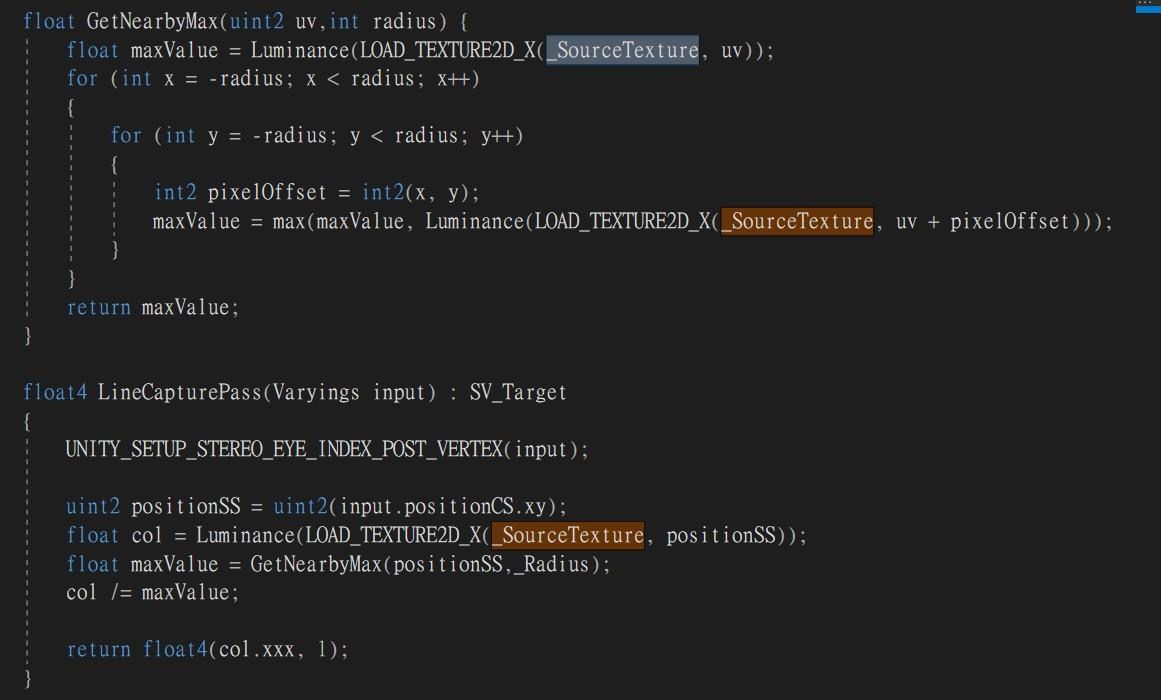
| float4 LineCapturePass(Varyings input) : SV_Target { UNITY_SETUP_STEREO_EYE_INDEX_POST_VERTEX(input); uint2 positionSS = uint2(input.positionCS.xy); float col = Luminance(LOAD_TEXTURE2D_X(_InputTexture, positionSS )); float maxValue = GetNearbyMax(positionSS ,_Radius); col /= maxValue; return float4(col.xxx, 1); } |
| float GetNearbyMax(uint2 uv,int radius) { float maxValue = Luminance(LOAD_TEXTURE2D_X(_InputTexture, uv)); for (int x = -radius; x < radius; x++) { for (int y = -radius; y < radius; y++) { int2 pixelOffset = int2(x, y); maxValue = max(maxValue, Luminance(LOAD_TEXTURE2D_X(_InputTexture, uv + pixelOffset))); } } return maxValue; } |

| TEXTURE2D_X(_SourceTexture); TEXTURE2D(_InputTexture); |
| public override void Setup() { if(Shader.Find(kShaderName) != null) { m_Material = new Material(Shader.Find(kShaderName)); _prop = new MaterialPropertyBlock(); } ... } |
| RTHandle LineCaptureRT; public override void Render(CommandBuffer cmd, HDCamera camera, RTHandle source, RTHandle destination) { if (m_Material == null) return; if(LineCaptureRT != null) LineCaptureRT.Release(); m_Material.SetFloat("_Intensity", intensity.value); m_Material.SetInt("_Radius", radius.value); _prop.SetTexture("_SourceTexture", source); LineCaptureRT = RTHandles.Alloc(camera.actualWidth, camera.actualHeight, colorFormat: GraphicsFormat.R16G16B16A16_SFloat); HDUtils.DrawFullScreen(cmd, m_Material, LineCaptureRT, _prop, 0); _prop.SetTexture("_InputTexture", LineCaptureRT); HDUtils.DrawFullScreen(cmd, m_Material, destination, _prop, 1); } public override void Cleanup() { CoreUtils.Destroy(m_Material); RTHandles.Release(LineCaptureRT); } |
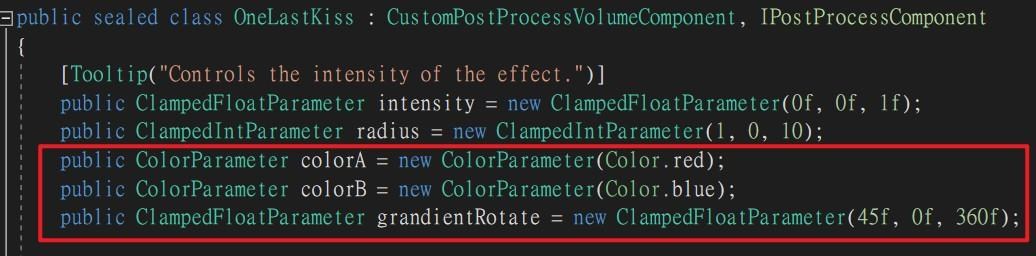
| float4 _ColorA; float4 _ColorB; float _GrandientRotate; |
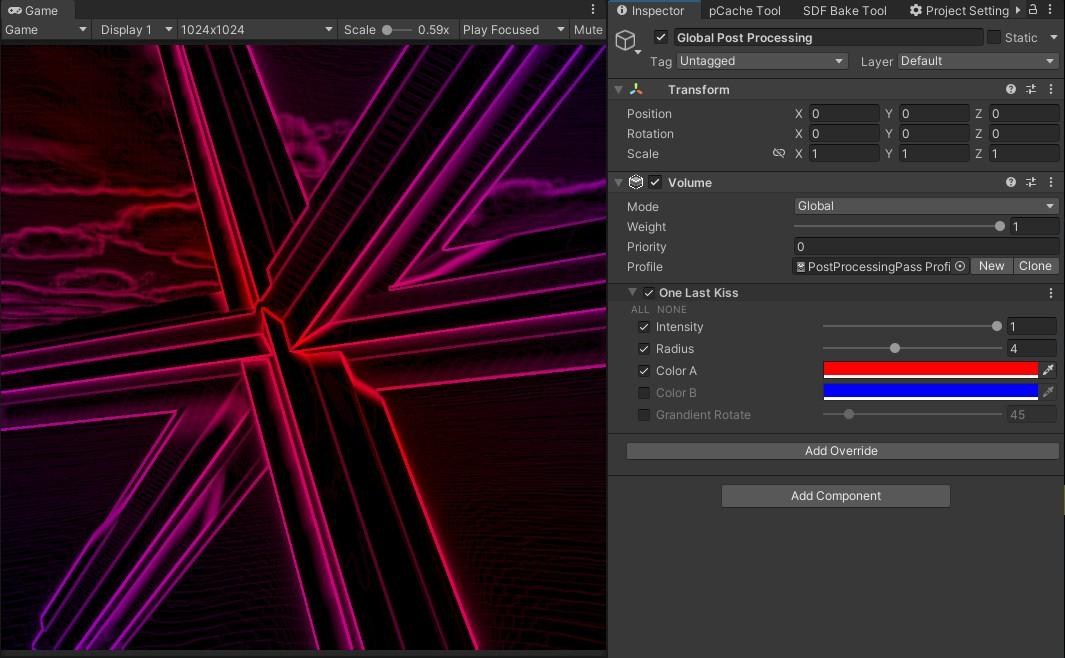
| float4 ColoringLinePass(Varyings input) : SV_Target { UNITY_SETUP_STEREO_EYE_INDEX_POST_VERTEX(input); float2 uv = input.texcoord.xy; float Grandient = Unity_Rotate_Degrees_float(uv, float2(0.5,0.5), _GrandientRotate).x; Grandient = distance(Grandient, 0.5); float3 GrandientColor = lerp(_ColorA,_ColorB, Grandient); uint2 positionSS = uint2(input.positionCS.xy); float3 col = LOAD_TEXTURE2D(_InputTexture, positionSS).rgb; float3 output = GrandientColor * (1 - col); float3 source = LOAD_TEXTURE2D_X(_SourceTexture, positionSS).rgb; return float4(lerp(source, output, _Intensity), 1); } |
| float2 Unity_Rotate_Degrees_float(float2 UV, float2 Center, float Rotation) { Rotation = Rotation * (3.1415926f/180.0f); UV -= Center; float s = sin(Rotation); float c = cos(Rotation); float2x2 rMatrix = float2x2(c, -s, s, c); rMatrix *= 0.5; rMatrix += 0.5; rMatrix = rMatrix * 2 - 1; UV.xy = mul(UV.xy, rMatrix); UV += Center; return UV; } |
| public override void Render(CommandBuffer cmd, HDCamera camera, RTHandle source, RTHandle destination) { if (m_Material == null) return; if(LineCaptureRT != null) LineCaptureRT.Release(); m_Material.SetFloat("_Intensity", intensity.value); m_Material.SetInt("_Radius", radius.value); m_Material.SetColor("_ColorA", colorA.value); m_Material.SetColor("_ColorB", colorB.value); m_Material.SetFloat("_GrandientRotate", grandientRotate.value); ... } |
 ,一起進步共勉之阿
共2則留言